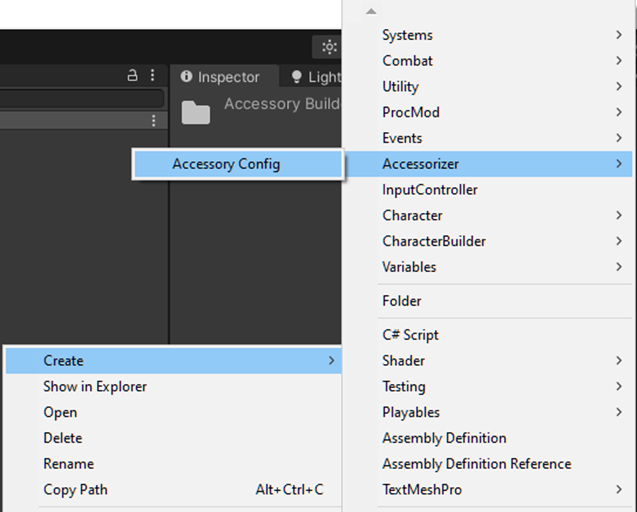
A scriptable object asset is used to manage item groups a selections. Create a new Accessorizer configuration by right-clicking in the project view, and selecting Create > Accessorizer > Config.
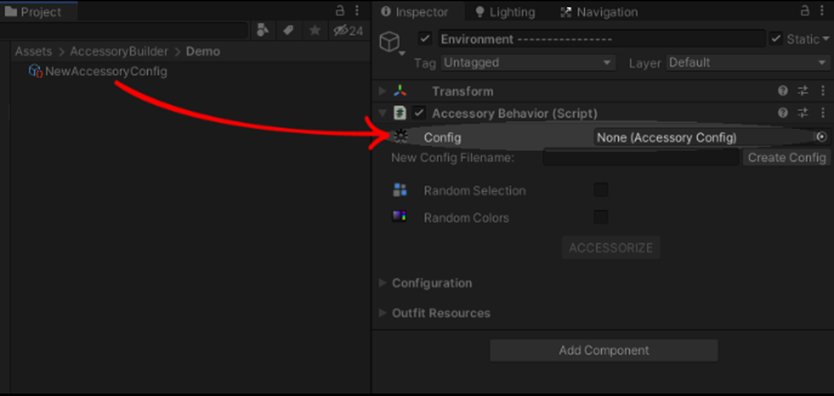
Add an Accessory Behavior component to the root transform of item wish to configure.

Place or select the accessory asset in the reference slot.
Create a new group for each collection of objects.

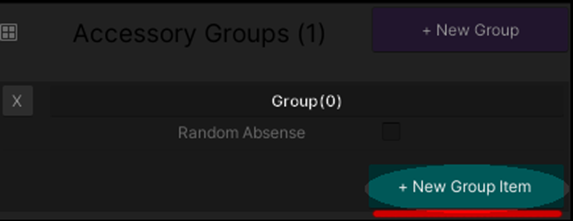
Add a new item to groups using the new item button.
Drop a game object from the scene view onto the object reference to associate the transform with the item.
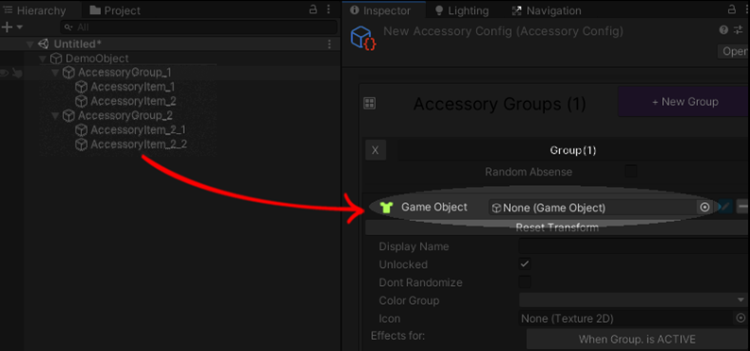
Warning: All item transform names must be unique!
Test item selection using the checkboxes on each item. When one item is selected, other items in the same group are disabled.
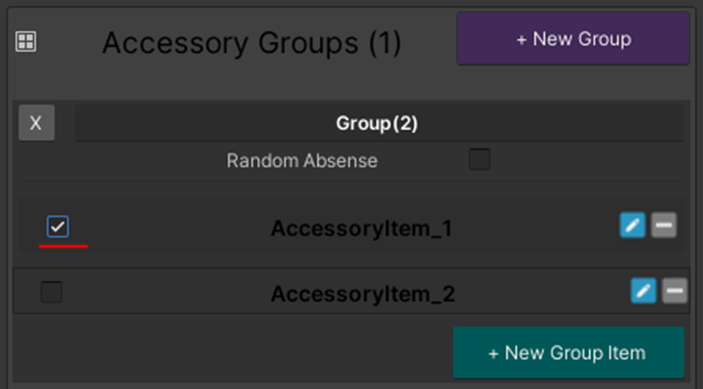
Note: Check for tooltips on properties for a description of their use.
Effects can be set to control the status of items in other groups when a particular item is active. To add effects, first open the item by pressing the edit button.
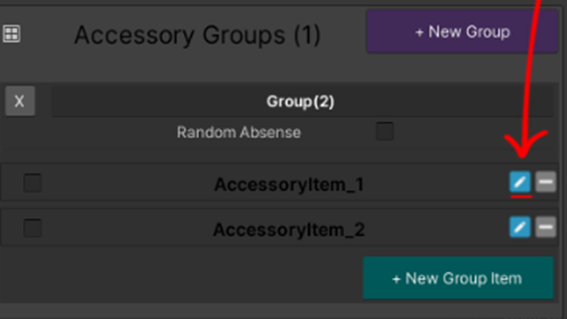
To add or edit effects for the current item, toggle the item’s effects button.
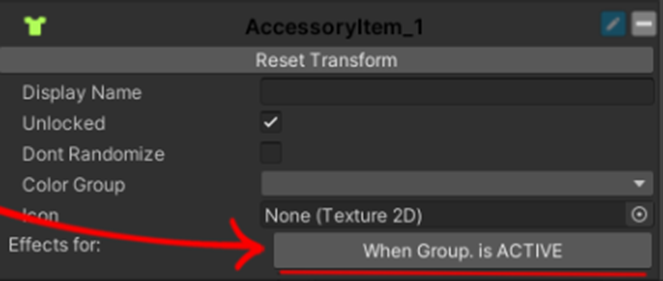
Note: Rules can only affect items in other groups.
In the following example, when AccessoryItem_1 is activated, AccessoryItem_2_1 is also expected to be active:
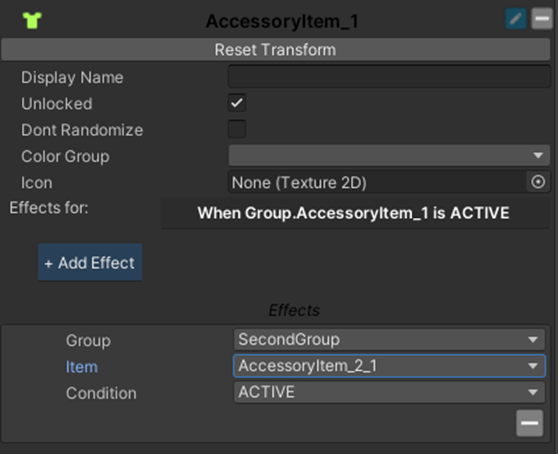
Rules are applied automatically if selection is randomized, and can be controlled programmatically.
Each item can belong to a single color group. Color groups are simple groups of colors, which modify the mesh materials’ color.
Create a new color group, and provide a name and size for possible random colors.

When an item is activated by either random generation or the SetItemActive method of the Accessory Behavior component, meshes will have their base colors modified if it belongs to a color group.
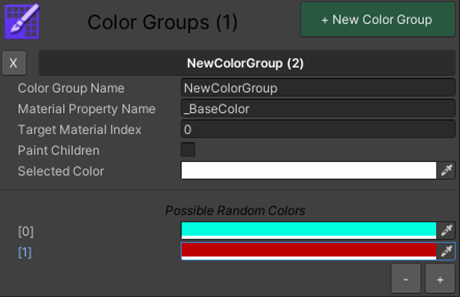
After creating the color group, associate items with the new group from the dropdown in the item editor.
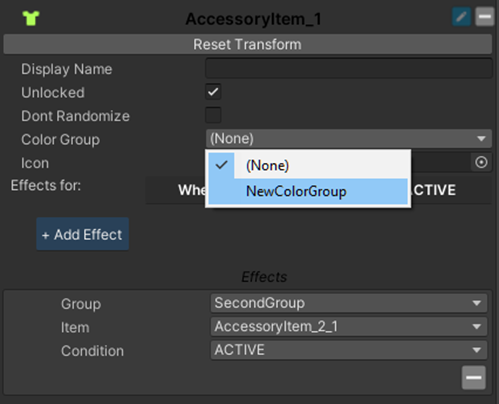
Note: Material colors are only modified at runtime.
After selecting a set of active items, that configuration can be saved as an Outfit, both in editor and at runtime. The following three ways to save a particular accessory configuration exists:
- Save in editor, deployed with configuration asset.
- Save at runtime to local storage.
- Save in editor as resource.
To save the current configuration in editor, expand the Outfits area and select [New Outfit].
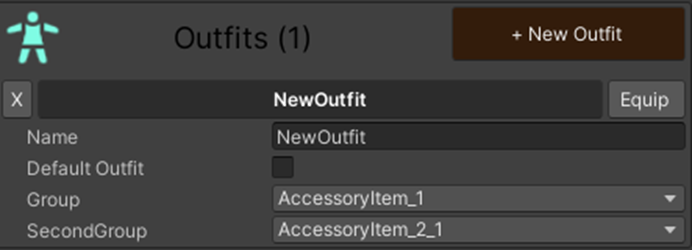
Outfits can be loaded in editor using the [Equip] button, or programmatically at runtime using the outfit name.
Note: Rules are not applied when equipping outfits.
To save a configuration as a resource file, expand the “Outfit Resources” section of the configuration:

The included demo scene contains script examples of all interactions, including saving and loading outfits from both resources and local storage.
If you have any questions or feature requests, feel free to reach out!
We appreciate your feedback, and would appreciate it if you would leave a review of the asset on the Asset Store.
